Introduction – To Course Main Photo
Choosing the primary sales image for your course is a very important step.
The thumbnail and course name are often the most prominent elements potential students see when searching or browsing for courses.
This article explores different types of course images you can use to effectively promote and sell your course.
What Are Your Different Options To Include
You can include a variety of things in your photos. In addition, you can include one or multiple elements in your photo.
Here are some of the key concepts you can include in your course photo:
- A professional picture – like a picture of you
- One or more tools – like a craft machine
- One or more tool components – like the fine hairs at the end of fine art fan brush
- A creator photo – like a professional face shot or pro in front of work
- One or more works – like showing a completed wedding dress
- One ore more work components – like close-ups of different 3D character models
- A background or environment – like colored background or home office
A Picture Of Your Tool
Showing a picture of just your tool can be a great option since it may be exactly what the student wants to learn.
However, some students might hesitate if they see a specific brand, like a Sony camera, when they own a Canon, making them question whether the course is right for them.
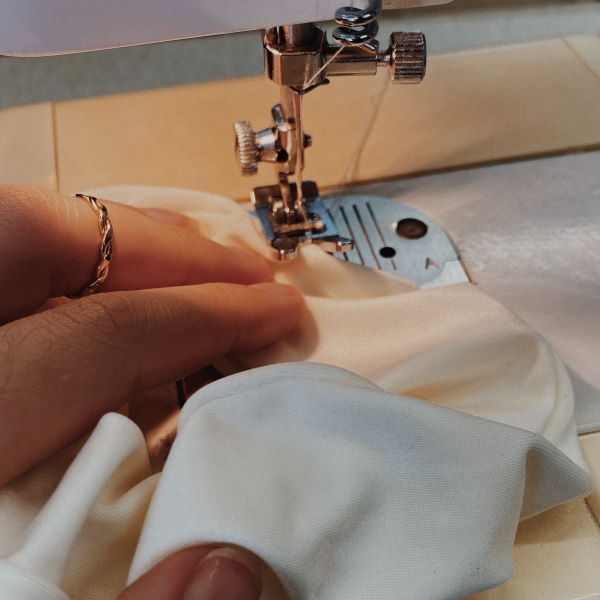
If your class applies to multiple tools, consider using an image that avoids highlighting a specific brand, such as a close-up of a camera lens or the needle of a sewing machine. You can also crop or remove brand names if needed.
Avoid making your course image look like a generic product photo from a shopping site, which can feel sterile and unengaging, especially with a plain white background. Instead, aim for a visually appealing image that grabs attention as students scroll through course options.
Close Up Of Tool Part
In some cases, it may be helpful to show a close-up view of part of your main tool. This can be especially helpful to intermediate students in advanced courses.
Here are some examples:
- The digital menu on an advanced sewing machine
- A screenshot of using a complex software tool like Illustrator to create bezier curves
- The pedals or controls on a MIDI piano keyboard
- The settings on a KitchenAid food mixer
Showing Your Course Tool In Action
Showing a photographer taking a photo in front of a scene is a very effective course photo. It helps the student imagine that they could one day take an amazing photo like this by taking this course.
While your still image may not show movement, an action shot can help you show how the tool is used to create something. An action shot doesn’t have to be a blurry moving image, it can simply be a mid-step photo within a bigger process of creating something.
Here are some examples of photos of tools in action:
- A sewing machine in use adding a ribbon to a shirt
- A stove top with a specific pan and utensil cooking the final touches of a fancy Italian meal
- A wacom tablet used to draw in Adobe photoshop
- A video editor layering several scenes and audio tracks to create an independent movie
Showing Your Tool And Professional
A popular and effective course photo option is to show a professional holding or using their tool. For example, a photographer with a camera or a master seamstress at her sewing machine.
Need Coaching? We Got You.
Level up your business with an experienced tech partner.

Check out our 1:1 personal pathfinder, small group leader Zooms, or quick technical audits.
These types of images help students envision themselves confidently using the tool, making the course feel more relatable and aspirational.
You can also choose an engaging setting such as a workspace, home office, studio, field, or classroom.
This “pro with tool” approach offers a wide range of creative possibilities. In many cases, it is more compelling than simply showing a camera or sewing machine on its own.
A Finished Work Product
A course that showcases a finished product can be a powerful sales tool. For example, displaying a freshly sewn little girl’s dress or a stunning sunset photo with a breathtaking landscape can capture attention.
If the finished product alone doesn’t fully convey what your course offers, consider adding a small image of the tool you’re teaching. You can place it as an overlay or in a circular frame in the corner for better clarity.
Zoom Into A Finished Work Part
For some classes, it may be beneficial to show how you help create specific results.
This is often the case in advanced classes, where you have to accomplish complex creative tasks.
Showing a picture of a completed hard step within a bigger project could really resonate with some of your buyers.
Here are some examples:
- Sewing – Creating a detailed embroidered pattern
- User Experience – Styling CSS text within a complex HTML object
- Crafting – Connecting metallic parts of costume jewelry
- Visual Arts – Creating a realistic glowing fire texture or effect
A Collection of Finished Works
Sometimes, showcasing multiple finished products in a collage can help tell the story of what you’re teaching. This gives prospective buyers a clear idea of what they can create after taking your course.
It may also spark an “aha” moment when they see exactly what they want to learn within your sample set. For example, an artist might notice that you teach face and hand sketches, exactly what they’re looking for. The same applies to sewing; instead of just seeing a quilt, they might spot one with the exact pattern they’ve been wanting to make.
Using A Solid Or Gradient Background
Sometimes, your tool, work, or face may be too busy or take up too much focus in your course photo. In that case, consider using a simple physical or digital background with a solid color or a subtle gradient.
You can then overlay your content in the center, on the side, or even across the edges for a cleaner and more balanced look.
Including Your Face In Your Course Photo
Some teachers choose to include a photo of themselves in their course, which can look very professional when done well. However, we recommend using your photo as a secondary image behind the primary photo of what you’re teaching. The main focus should highlight your tool or output, with an optional smaller secondary photo showcasing your professional appearance, expertise, or a recognizable image from your blog.
Many course platforms already feature a teacher bio picture, which may be enough if you want to showcase your image or strengthen your personal brand. This allows you to use your primary course photo for maximum sales impact while leveraging your bio picture for an extra personal brand book.
Photos For Collections Of Courses
If you have a collection of courses, you may want to use a consistent visual motif across all your course images.
For example, in an Adobe course series, you could maintain a similar layout while swapping out the software icon for each course.
Similarly, if you offer lessons for different camera brands like Fuji, Canon, and Olympus, you might use a uniform course image while changing the camera photo to match each specific model.
This approach helps create a cohesive brand identity and makes it easier for students to recognize your courses at a glance.
A/B Testing For Courses
A/B testing is when you compare two versions of something like a sales page or course photo to see which performs better. If your current image is doing okay but could be improved, you introduce a new version and test them against each other. This helps you determine which one drives more engagement or sales.
You can use A/B testing to test and improve all sorts of things like:
- A Sales Page heading like “Learn How to Sew Costume” vs “Create Your Own Costumes”
- A Button like Buy Now, or Learn Sewing now
- A sales photo showing your 3D program like Maya versus a fully renedered 3D cartoon scenes
Once you have a well-performing image with statistics like page visits or sales over a few months, you can introduce a new challenger image that you believe might perform better.
Some learning platforms allow you to automate A/B tests testing, showing one image to 50% of your audience and the new challenger image to the other 50%. After a week or a month, you can compare the results to see which image converts better and update your course sales content accordingly.
Conclusion – Good Course Photos Help You Stand Out
Choosing the right course photo can help your course stand out in a crowded niche.
Depending on where you are in your course business journey, you may need to decide whether it is more valuable to showcase a sample of your amazing work or a well known face.
One of the key choices is whether to highlight the tools themselves like cooking pans, the tools in action such as fish sizzling in a pan, or the final highly desirable product like a beautifully plated dish of seasoned pasta and fish.
Since you are creative and think outside the box, pick a course cover that makes a strong impression!
FAQ Course Pictures with Tools and Work
So now, you’re a lot smarter. Thanks for hanging out!
Please subscribe to get more tips for creative online course teachers.
These lessons can also help you with Education and Course Content:
Designing Your Online Course Curriculum
Teaching Online Using Barak Rosenshine’s Principles of Instruction
Business Tools for Online Course Creators