What Is A Course Welcome Video?
A welcome video helps new students when starting your new creative course. It’s the very first few minutes of your students spending personal time with you, just like the exciting first few minutes of meeting the teacher for your new college class.
In your welcome video, you’ll want to introduce yourself, go over the platform, go over what they will learn, and guide them in the right direction for their first few lessons.
Why Create A Welcome Video?

If you don’t create a new welcome video for your creative course your students may be completely lost when they first start your course.
A welcome video not only introduces you to your students in a personable way but it helps them orient to the course. With a basic intro they will understand the course technology, the course structure, and the end of course content.
Here are some of the questions that you can help answer with a course welcome video:
- Who is the teacher?
- What is this course about at a high level?
- What kinds of topics will I learn about?
- How is the class content structured?
- How do I use the course technology?
- What do I do if I have a problem?
- Where do I start?
What To Name Your Course Introduction Video
Your welcome video should have a good name so that it pops as important in the course lesson outline.
It should have a name that encourages students to watch this video first instead of diving in and clicking around. Of course, if a curious student wants to hop around and figure things out on their own, that is allowed too.
But you will want to choose a title that makes it very clear that students should start here.
Here are some example names for your online course video:
- Welcome to Learning Interior Design
- Sewing Course Overview
- Class Introduction
- Start Here
To really drive home that this is the first video you can also add some extra words at the end. These can be in parenthesis, caps, italics.
Welcome video examples with priority flag:
- Course Introduction (Start Here)
- Welcome (Watch This First)
- Introduction To Copywriting – Watch 1st
Don’t forget to think about SEO for your welcome video so that your introduction to topic video listed in your sales page outline can get found by student searches. For more information see: SEO For Your Online Course.
Where To Place Your Welcome Video?
Your welcome video should be in the first module or section of your course.
If you only have one big module, make it your first video in your collection of lessons.
Before you get into teaching any of the content or explaining parts of how you structured the course you need to provide a nice warm and sincere welcome for your students.
Need Coaching? We Got You.
Level up your business with an experienced tech partner.

Check out our 1:1 personal pathfinder, small group leader Zooms, or quick technical audits.
So make that welcome one of the first things the student sees.
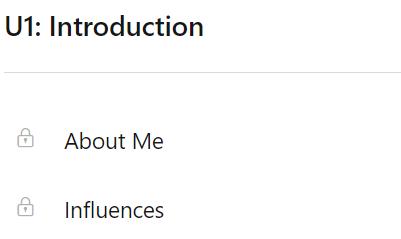
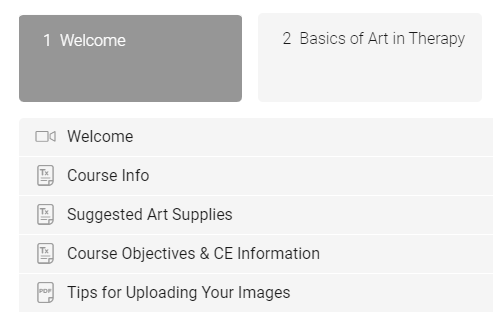
Intro Module Vs Intro Lesson
The very first section of your course might be called the introduction, but remember that each section usually contains several lessons inside of it.
It could be confusing to students to have a section called Introduction and then a lesson called Introduction inside of it. Or not clear by having a group Welcome with a course Welcome.

We recommend using a slightly different name for the introduction module and your introduction video lesson.
Here is an example of a good Welcome Video within the Introduction Module:
- Introduction
- Welcome Video – (Watch First)
- Essential Video Terms
- Setting Up Your Software
- New Student Survey
- The Final Cut Pro Interface
- Creating Your First Video
Introduce Yourself
Please let your new students know about you your background, your education, your relevant work experience, and your accomplishments.
You will want to assure your students just like a teacher on the first day that you are qualified to teach the content that they are about to learn.
You will also want to stir excitement so that the students are excited to learn more about you after hearing about all your great knowledge and experiences.
During the introduction, you’ll want to look straight into the camera and be very personable where is for other parts of your welcome video it’s great to show clips.
You may want to also have a deeper 2 to 5 minute video about the instructor, but you should still do a 30 second light intro inside of the welcome video.
Talk About The Skill Transformation
Your welcome video should let students know how they will be transformed after taking your course.
You can let your students know that they will go from not knowing anything about a particular topic to being a comfortable professional that knows how to do a, b, and c within a particular domain.
Course transformation example:
In this course, you will learn how to create your own costume jewelry even if you may initially not know anything about creating jewelry. You will learn all the steps and the tools that you need so that you can create, wear, or even sell your first professional artisan jewelry.
Explain Your Content Structure
Initially, students will not be familiar with your class structure, so it’s a good idea to spend about 15 seconds explaining to them how your course is structured.
Help your students with your naming convention like do you call your big content containers modules or sections. Afterward, explain what you call each individual lesson or topic.
You can explain to your students that your course is organized in a series of 7 modules. Where each module has a set of about 5 lessons covering specific sub-topics.
This way you can later tell students specific instructions like:
- You’ll learn more about this in the Color module
- If you dont recall the octaves, go back to the Notes lesson
- In the next module, Lighting, we are going to go over setting up the lights on stage
For more information about sections and lessons see Maximize Your Lesson Count To Sell.
The welcome video should explain the basics of the course technology user interface.
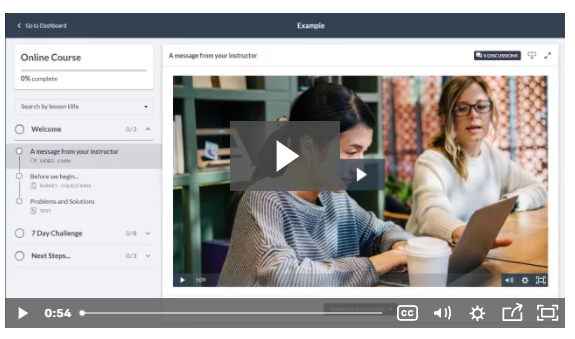
You should explain that once they log in to the course system they will see certain things. For example, on the left they might see all the modules available, and on the right is the expanded view of the videos or text for the selected lesson on the left.
Tell your students that there are a total of X modules and each module is in sequential order from top to bottom.
Explain that modules are expandable, so when you click it you will see all the child lessons. Then you can click an individual lesson to see the content on the big main window.
You can add friendly student tips like the course will remember what they last watched, so that they can continue another day from where they left off.
Students Can Learn Anywhere They Want
You can explain to your students that they can watch your online courses wherever they choose.
For example, they can watch from home as well as on the bus or even while waiting at the dentist office.
Here are some places where your students could watch your course:
- At home
- At work or during breaks
- At school
- While commutting
- While waiting
- While relaxing at a cafe or beach
For some students, this might be a really valuable feature that they can watch your course from anywhere.
Some students will really appreciate the fact that they can start to watch a course at home and then continue right where they left off when they get to the next place.
Remind Students About Any Device
If your course technology like thinkific.com allows students to watch on different devices, you should let them know.
Students will find it very valuable that they can watch on a desktop, living room TV, tablet, and mobile phone.
If your course supports these options you could say something like:
You can take this course using your desktop computer at home or at work, or you can use your mobile devices such as a phone or a tablet to take your course remotely while you’re on-the-go.
Explain Your Different Teaching Mediums
In your introductory video, it would be nice to explain to your students what are the different kinds of lesson types that you offer.
For example, you may offer classes that are videos classes of you talking or teaching, as well as slides or complicated videos where cameras watch your hands as you teach your skill.
In some cases, you may even switch between multiple modes depending on this particular topic that you’re teaching so you may want to let your students know.
A sewing example:
In this class, we will use a few different kinds of lesson graphics and videos. Sometimes we’ll go into classroom mode where I’ll explain a skill to you or show you some slides. Other times, you’ll watch me at the table or my hands as we cut and sew fabric.
Explain Your Course Player Tech Features
Your intro video could summarize the technical features of your course user interface
For example, you can explain that the video player supports subtitles and that you can change the language of the course. You could also explain how the window of the video lesson could be minimized or put into a picture-in-picture (PIP) mode so that the student can work on their computer while watching or hearing the course.
Your online course learning platform could even allow different bandwidth settings so that a student with low internet speeds or far away student from your server could watch your video in 480p instead of High Definition (HD) 1080p which requires many fewer pixels and data bits every second.
If necessary you can also provide a link to a PDF or web page with additional technical settings this way in your intro video you can say something like for more information on how to get the most out of your course video player see the player tech settings link in the intro lesson notes area.
Learn Your Way
You may want to remind your students that they have the ability to watch and learn to take lessons sequentially from beginning to end or by jumping to any lesson that they need now.
Often students will want to take your course the way you have organized your content like a book from beginning to end. They will trust that as a teacher you are going to organize content so that they can learn the foundational elements followed by additional supplementary topics.
Some of your students may want to hop around and take just the lessons that they need. If this makes sense for your course you’ll want to let your students know that they should be free to hop around and take the specific lessons and modules that they want as they need to learn individual topics.
For example, if this is at the top of Photoshop class they may want to be very interested in learning photo touch-ups like red-eye removal and that is the number one thing that they need to know this week so they can certainly take that lesson now. At some future point, they can take another lesson that they need to know – regardless of where it is within the list of all lessons.
Showcasing Sample Lesson Clips
Your welcome video can have you on-screen introducing your course and going over the essential content for your class. But in doing so you can also show various clips of different lessons.
For example, your intro video could spend 15 seconds on each of the modules in your course. It could show a clip of you teaching a skill in each module.
Remember you’re going to have several lessons in every module so the intro video could just give us a snippet of what is taught in each module.
Explain The Availability Of Course Content
Students will want to know that when the course content will become a fully available. They will want to know if they watch the classes immediately or do they have to wait.
You may want to highlight how long content is available for students. For example, you can explain that the lessons will be available for a whole year, or maybe they can watch lessons forever and come back to lessons whenever they need them.
Some courses have content that slowly becomes available. This type of content delivery is called dripped content. Often email courses do this and share content week by week. If you are offering a course that slowly makes more lessons available on a schedule you should let your students know this.
Students like to know that they can learn at their own pace that they don’t have to hurry up and watch the course when in real-time when you teach it or and that they can also take the course whenever they like at any time of the day or any week that they happen to be free or need the content.
For more information on different course access options see How Long To Allow Course Access.
Create A Fun & Positive Introduction
You will want to make the students feel comfortable, intrigued, and excited during your welcome video.
Students should feel comfortable being with you for the next few virtual hours.
They should genuinely like your personality and it should be consistent with what they read about the course and what they saw in the about the course trailer video on your sales page.
How Long To Make Your Welcome Video
Your welcome video should cover some of the essential topics but it shouldn’t cover every topic.
It should cover key topics and when necessary let them know how to find out add additional information about each of the topics.
A good welcome video is about 2 to 5 minutes long.
If the welcome video is too short, then your students may have so many questions that they may start hopping around your lessons.
If your welcome is too long, they may get itchy and jump into the content and therefore miss important messages that you had in your welcome video.
Other Types of Intro Videos
Class Trailer Vs Welcome Video
A class trailer or preview is like a movie trailer for your course. It gives prospective customers an overview of what your course is about.
In your class trailer, you can give students information about what they will learn. You can introduce them to yourself as a teacher you can show video clips about the different things they will learn in your course.
Often the class trailer is a sales vehicle sales tool. It will help you win over customers that are interested but give them a little bit extra so that they can click the purchase button. You may even say “Click Buy now if this sounds like a good fit for you” in your class trailer.
Often the class preview is not inside of any of the formal modules and lessons it’s a video that you record that you use primarily on your sales page. You may host it on your class sales website or external host like Vimeo or AWS.
Whereas the welcome video is usually included in your course outline. You can also make the decision of including your welcome video as a free course lesson so that prospects browsing your outline can view your intro video. Again the intro video is different than the class trailer and you will use different language to explain things a little differently for an actual student versus one that is considering the class.
A Getting Started Video Vs Welcome Video?
A getting started video helps students orient themselves so that they can best take your class.
For example, it can help them set up their table workspace and letting them know what tools or supplies they might need or software to use.
It might also help them best arrange their screen so that the instructional videos are on the left or minimized using Picture in Picture (PIP) so they can watch the video while they work.
Sometimes a getting started video may provide a brief history or some background before students dive into specific modules and lessons. This way they can have some background about the material before getting into specific topics.
It may also be useful to baseline your students with a few important terms in a getting started video before you use them throughout your lessons.
The intro video is supposed to welcome students and give them their first few minutes in your course. A good approach is to have the course with an intro video and then follow it with a getting started video. The intro video introduces the students to you, the course material, and the course system. If necessary, follow the intro video with a getting started video which includes a primer before the other specific skill lessons.

If you only have one video that serves as both a welcome to the course and getting started lesson that is ok too. Especially if the combined video is just a few minutes long. If the video gets too long, you should consider breaking out the video so you can really focus on welcoming versus student orientation.
Why Study This Topic Video vs Welcome Video?
Some course authors include a why study topic lesson in the intro module.
This kind of lesson is good so that you can learn the benefits of a particular skill. This is useful for students that don’t yet know the full benefits but may know that they should learn a topic eventually.
Some teachers provide a why study this subject video. While this seems a little silly since the student has already paid for the course, the real purpose of this video is the connect the dots for your students.
In the why study topic video you will typically explain how this knowledge will help a student in their professional journey.
The why study video is different than a welcome video. The why study this topic video explains the benefits of knowing a particular subject while the welcome video really introduces the student to the class content and how to take the course. We recommend the introduction video appear before the why study this topic lesson.
Meet Your Instructor Video Vs Welcome Video?
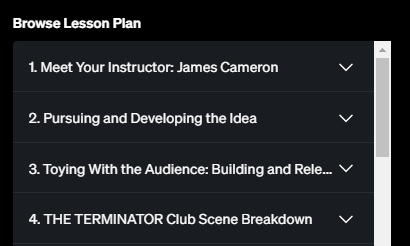
The meet your instructor lesson is where students will meet you and hear about your background, your skills, and your experience. This video may be 2-3 minutes of resume like material, where you make the student comfortable that you are sufficiently skilled at teaching this course.
The course trailer, welcome video, and meet your instructor video are great ways for students to hear you your accent or lack of an accent and feel comfortable that they can learn from you. The same applies to how slow or fast you speak, which can be an important factor for some students.
A welcome video has a brief teacher introduction but also hits other important topics about the course system, curriculum, and student journey. We recommend the meet your instructor video appears after the welcome to the course.

Using Free Previews For Your Course
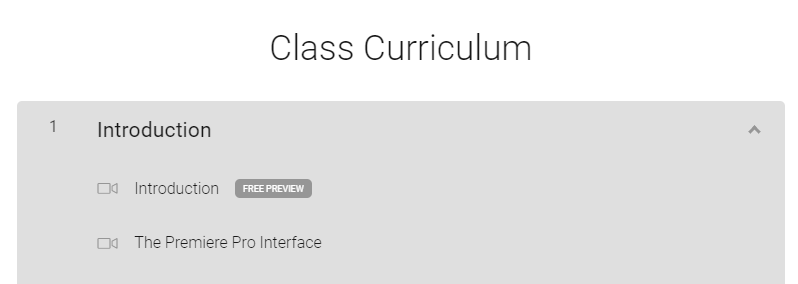
A class free preview is usually a lesson within your course that you allow non-paying customers to view
This is usually a lesson that is not critical so that you don’t lose money from students who get critical free tutorials.
This lesson demonstrates to prospects your teaching style, your speaking ability, your skill level, your video production capabilities, and your audio quality.
The free class is usually on the shorter side of your typical lessons. A good free lesson may be 3 to 10 minutes long.
Some people utilize a few free lessons, but other teachers like to include many free lessons like one within each module.
The class free preview is tagged as free in your learning management system so they don’t need to be a subscriber or a paid students. In some cases, it may be free but require your students to register for your course.
Sometimes prospects may be able to access the free preview through the online course sales page where they will see a play icon or a free label on the lessons that you have tagged as free.
You can certainly make your welcome video a free preview, but we recommend using free videos for your sales trailer / overview video, a teacher introduction video, and most importantly a few sample lessons.
Course Fundamentals Vs Welcome Video
Some courses provide a course fundamentals video this video is really intended to provide basic knowledge about the skills before diving into more specific skills or specific or advanced skills
Remember that the welcome video will teach students how to use the core system and how to go about taking the modules of the course.
Your introduction video could suggest for students to take the fundamentals lesson before they dive in and hear a bunch of complex terms. For intermediate classes, some students may already be familiar with the fundamentals and they can optionally take the lesson if they aren’t familiar with basic terms.
While the fundamentals lesson is can be very important for your training, it should generally come after and welcome video.
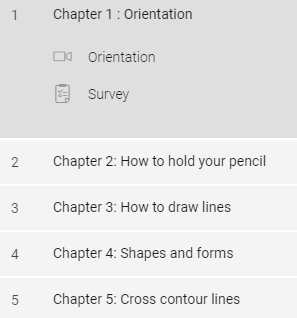
The Intro Survey
One important thing to do in the introductory welcome video is to remind students to take the before class survey.
The before class survey collects information about every new student such as their current skill level and what they intend to learn in this class.
The survey results can be used to verify how well you’re teaching the students when they later take the end of course survey.
This survey is also informative from a teacher sales point of view because it lets you know the pain words that students used to describe their learning gaps. These same words can be used in your sales course page or it may help you come up with new ideas for additional courses content or services.
Here’s how to quickly mention your survey:
One of the things that you should do when you first start this course is to take the new student survey. This will let us know what kind of content we should improve or add to this course.
For more information about surveys see Using Surveys To Grow Your Course Sales.
Common Module Content
Each module in your course may follow a common pattern so it would be useful in your welcome video to let your students know this.
For example, you can let students know that every module includes a study guide and a quiz.
The study guide could provide a PowerPoint or PDF that further explains or summarizes the content for the module. This could be text or video embedded in your core system or it can be a downloadable resource.
Often course modules include an end of module quiz to confirm that the students have learned the essential material like key words.
How to describe your common module content:
Every module in this course has a music training guide PDF that you can view and download. In addition, you get to practice and verify your new module skills with a quick quiz. Remember at any point you can go back and watch any of the lessons again until you’ve mastered your music skills.
You’ll want to let your students know that you’ll see them again at the end of the course, where you’ll wrap up the class, talk about their new skills, and tell them some really useful next steps.
At the end of the course video that’s where you can tell them about bonus materials, end-of-course survey, and end of course project.
So in the intro, give them a slight heads up about what’s coming up at the end of the course without spending a lot of time or revealing all the details.
Save Some Goodies For Later
The introductory video might be the first video lesson that a new student watches. While there is so much to tell the new student, you should use restrain to save some goodie details for later.
While you are probably just as excited to share your bonus materials with your students. There is so much information that you need to tell your students in this first introductory video that it would be better to save talking about the bonus content during the end of course summary.
Here are some art class type goodies to save for later:
- Templates
- Group memberships
- End of course review
- A free mini course for a followon topic
What To Do If Students Have Trouble
Your students should know ahead of time what to do if they have any problems while taking your course. You don’t want them feeling clueless or even worse, asking for an immediate refund.
You may want your students to send you an email or post a note in the comments or send you a direct message.
It’s important for you to let your students know what to do – not only so that they can get unblocked but also so that you don’t encourage posting frustrating problems to social media or other public channels
Since you don’t want to talk about every possible problem, you may want to just let students know that if they have any problems they should check a particular resource or link that you make available. There you can go ahead and offer different support services for each type of problem.
Common course student problems:
- Log in information
- Billing
- Audio and video issues
- Not accessing the resources
- Copy course content questions
- Internet mobile or browser issues
- Language closed captions or subtitle issues you paragraph
Remember that if your students have a great experience, they are more likely to recommend or buy another related course or service from you in the future.
In some cases you may be able to send students to your learning technology platform support page. As an example, Thinkific provides a good support page Troubleshooting Guide for Student Issues.
For more ideas about common problems check out Frequently Asked Questions for Creative Course Sales.
Creating A Welcome Video – Summary
In conclusion, now you know what it takes to create a good online course welcome video for your creative class.
You know what to call it, where to put it, and most importantly what important content to include.
Unfortunately, many students don’t finish online courses. But using a welcome video can really help fast start your students and give them the best opportunity to succeed and complete your course. Completing your course will give them results, and give you positive reviews for more students and revenues.
So you should add a welcome video to any new courses you are planning, or if you already have a course without a welcome video, you should consider adding one the next time you update it.
The welcome video is just a few minutes long, but it’s full of valuable information that can make a big difference for many of your students.
If you would like an audit of your current class including your most critical video lessons, please see our Review Online Class audit.