Introduction
Are you looking to create a PDF resource guide for your students using Google? Trying to convert other file formats to PDFs may be stressful, but Google is here to help.
Google Docs and Google Slides provide a quick and easy way to create organized and visually appealing PDF guides in minutes. They also improve your efficiency and effectiveness. By creating PDFs, you can conveniently share your files with your students and community.
In this lesson, we will explore the steps involved in creating a PDF resource guide using Google Docs and Google Slides.
Problems course creators can encounter if they don’t create a resource guide with google:
- You may find it difficult to share your resource guide in a format that’s easily accessible
- You may be unable to secure your classified information from an unauthorized audience
- You may not be able to integrate various kinds of content into your document before converting it to PDF
- You may not achieve your goal of sharing your content as intended without any alterations from your students.
- It may be challenging to create your resource guide in a different file format before converting it to PDF
What is a PDF File?
A PDF file is a free file type with words and images that can be accessed by different devices and browsers. PDFs are awesome, and they work almost everywhere. Unlike some file types that work only on certain devices, mobile desktops, or operating systems like mac or windows, PDFs work everywhere, and it’s a great way of giving resources to your audience and community.
What is a Resource File?
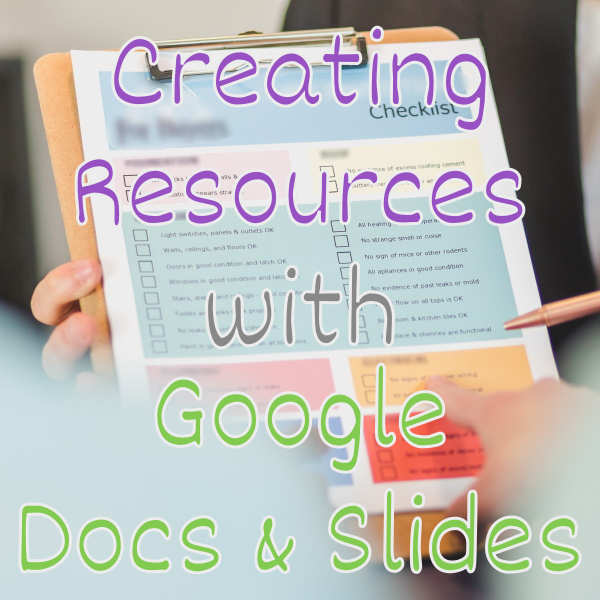
Resource files are helpful files with tips, steps, or checklists that you provide to your students or audience. It could be a part of a course, a community, or a lead magnet to get people to sign up for your mailing list. However, you will be creating various kinds of resource files, and it’s real easy to create these resource files as PDFs with Google.
Key Steps to Creating a PDF Resource File
Let’s get into how you would create a PDF resource file with Google
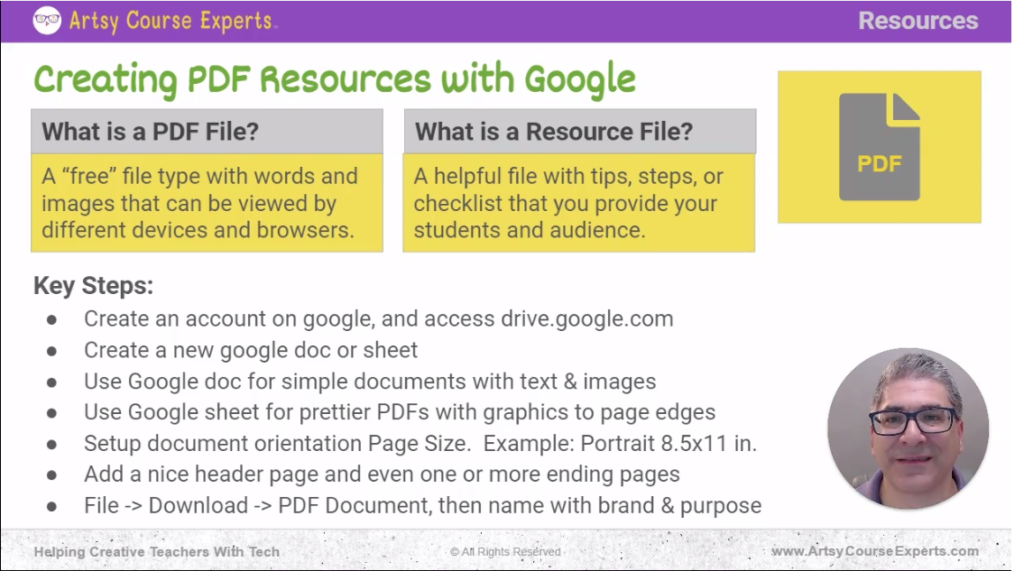
Create An Account On Google, and Access drive.google.com
First of all, you’ll need a Gmail account. Not to worry, you can create your google account using any sort of email, then you will be able to access your files.
Create A New Doc Or Slide
Now that you’ve created a Google account, the next step is to visit drive.google.com to see all your documents, slides, and other files. In there, you are going to click the button that says create a new doc or sheet.
Use Google Docs for Simple Documents with Texts and Images
Next, you can create a document. It’s similar to creating a word Doc. You can create a Google Doc, and it’s perfect. You can just type your content in there.
With this, You can provide tips, resources, and bulleted lists. Also, you could even insert some images or some standard header and footer on every single page.
Use Google Slides For Prettier PDFs With Graphics To Page Edges
You can also use Google Slides for prettier PDFs. The slides could have graphics, and they will surround the content all the way up to the page edge. You can’t do that with Google Docs. So Google Slides are pretty cool for this.
Set Up Document Orientation Page Size
Remember, whether you use a Google Document or Google Slides, you can set up the document for the orientation that you prefer. You can set up the width and height. So if you’re a portrait, you might choose 8.5 x 11 inches. If you’re a landscape, you might choose one of the 16 x 9 inches formats. Always bear in mind that portraits are vertical, and landscapes are horizontal.
Add A Nice Header Page And Even One Or More Ending Pages
You can choose whether it’s just easier to brain dump in a document or you really want to lay out every single page. You can use Google Slides for that. Once you have the document set up, you can start typing. You might choose your colors and things like that.
You might even create a nice header or even one or more ending pages. Also, you may have a full-screen page that introduces your resource.
You could just dive right in and have an introductory paragraph. That’s up to you. As you get better, you will have these templates, and you can reuse them so that your next resource gets better and better.
File > Download > PDF Document Then Name With Brand And Purpose
Once you are done with creating your Google Document or Google Slides, you will be able to download it as a PDF. To do this, you can click the menu button, click your file download, and get your PDF document.
I would recommend you also save it with your brand name and purpose. As an example, a brand name could be artsy course experts – how to get more subscribers on your email list.pdf
That’s your PDF in case it makes it out and about, you’ll put it on your community, course, MailChimp, or wherever you want to put it. After a while, it might get out there. So you might as well put your brand name in there.
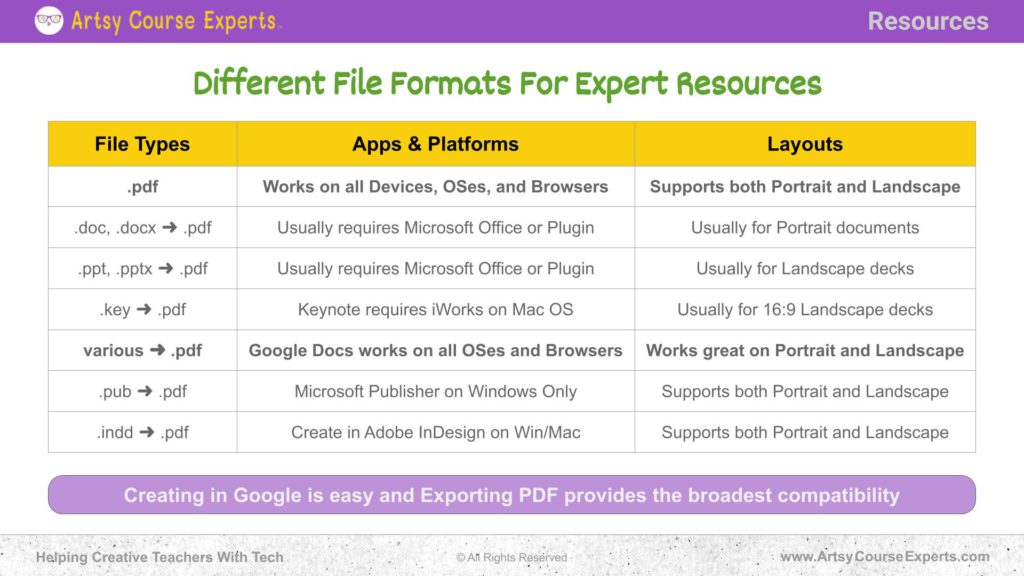
Different File Formats for Expert Resources
Now you know how to create some PDFs using Google. PDFs are great, they work everywhere.
There’s a variety of other docs, but you might require other types of file formats like Microsoft Office or Document, PowerPoint, or Keynote that only works on Mac.
There are even really advanced tools like Microsoft Publisher or Adobe InDesign that really are just for making very high-end brochures. They might be pretty and awesome, but they could be painful and expensive which may not be part of your skill set.
You might not have those tools. Just use the docs and slides; yes, you can create PDFs in minutes. In a half hour, you can create a pretty useful checklist – A couple of tips just to get those students where they need to go for that particular step.
Frequently Asked Questions about Creating A PDF Resource Guide With Google

Summary – Creating A PDF Resource Guide With Google
Sharing a PDF resource file just got easier! Creating a PDF resource guide with Google is a quick and easy way to compile and organize information for easy access and sharing with your students and community.
By using tools like Google Docs and Google Slides, you can create a good-looking and comprehensive resource guide in a matter of minutes. This will make things easier for you and your students.
Here are a few tips you should have in mind when creating a resource guide:
- Ensure that your files are well organized for convenience and easy identification.
- Consider the needs of your audience when selecting the orientation page size of your document
- Use Google Docs and Slides to create your course content in minutes
- Endeavor to save your document with your brand name and the purpose of the course before downloading it
- It’s best to go for tools that are convenient for you both financially and skill-wise
- Always use PDFs because they are not picky; they work everywhere
Now you’re smarter in creating resource guides with Google Docs and Google Slides.
Please subscribe for more tips. If you want more tips for creative online course teachers, for tech help with courses, communities, or teacher websites, visit www.artsycourseexperts.com.
More Tips For Online Teachers
These lessons can also help you with course resources, design, and production:
- Using A Directory Of Resources For Online Course Teachers
- How To Create A Guide For Your Online Course?
- Using Canva To Create Quick Lesson Illustrations
- Using Title Slides for Online Course Lessons
- Finishing Your Online Course – When It’s Taking Too Long
- Checking The Quality Of Your Online Course Lessons
- Creating An Online Course – Welcome Video
- Help Students With End of Lesson Transitions
Related Services For Teachers and Experts
We offer these services to help your course business with content and technology coaching:
- Online Course Coaching
- Analyze Class Curriculum – Outline & Lessons
- Analyze Your Online Course SEO
- Course Technology Maintenance
- Community Technology Maintenance
- Build An Online Course

