When you buy a new, top-of-the-line sewing machine, you can expect to receive a user manual to go along with it. These instructions tell you everything you need to know as a customer and future user about how the product works, from product assembly to troubleshooting solutions. The same goes for any product or service we purchase. Customers are used to being guided through new experiences, and if the product doesn’t come with instructions, it can reflect negatively on the purchase and even the company.
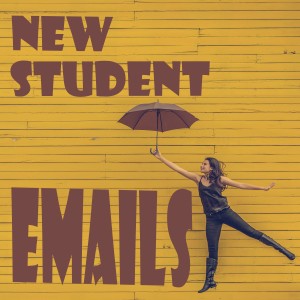
When it comes to online courses, your students are the customers and you are the company and brand. Customers that register for your courses are expecting the same guidance from you. It is essential that you provide relevant details before the course starts so that each student can feel confident and prepared. To accomplish this, a welcome email should be sent after the purchase has been completed. Think of this email as that one-page high-level cheat sheet that’s included in the box before you have to read the actual step-by-step instruction manual.
One would hope that a student seeking to learn a new craft or reach new levels of expertise would know what they are signing up for. However, that doesn’t mean that you can skip out on providing the details, as doing so helps them feel good and gives them direction on their purchase.
Receipts vs Welcome Emails
Receipts are very important because they provide proof and detailed transaction history of the course purchase.
Receipts primarily include financial information like:
- Date of purchase
- Which course was purchased
- Amounts of course, discount, tax, and total
As an instructor, you or your learning management system should send receipts in a timely manner – typically within a few minutes of purchase.
However, a receipt is not a substitute for a proper welcome email with what a student should do first. These two communications should be sent separately.
Why Send Welcome Emails?
Even though a welcome email is a great way to set the tone for your course, many instructors don’t feel it’s necessary. If you choose not to send one, you could unknowingly introduce some risk factors to the success of your course.
Some student issues that can occur without a welcome email:
- Miscommunication between you and your creative customers
- Students not reading your emails with messages, review requests
- Misplacement of course system web link, username, or password
- Refund requests due to buyer’s not starting or using the course right away
A welcome email not only serves as an introduction to your brand, but also serve as an upselling tool for other services, courses, and community resources. Although it requires a little extra planning and writing, it is critical in ensuring the success of your students and your course.
Additionally, a welcome email is a great way to introduce your proper and longer intro welcome video, which provides more detail and starts to build a relationship with your new students.
Introduce The Teacher
The who are you part of your welcome email should be easy right? If you’ve advertised yourself as an expert teaching the course, then your work for this question is done. If, however, you have advertised a course but have not immediately provided information on who the teacher will be, use the welcome email as a forum for introduction. Be sure to share your professional background, your related hobbies, and maybe some of your personal background, if you prefer to be authentic (recommended). This will help build rapport with your students as a trusted professional.
Introducing yourself example:
“I’m Julia Jones, your instructor for the jewelry-making for everyone course. I have had an interest in costume accessories since I was a little girl, and I own my own bohemian jewelry store.”
Additionally, creating an “About the Teacher” video on your course would be a great way to fully introduce the teacher. You can also reuse this video on your landing page, blog, or social profile.
Need Coaching? We Got You.
Level up your business with an experienced tech partner.

Check out our 1:1 personal pathfinder, small group leader Zooms, or quick technical audits.
How Do Online Students Actually Take The Class?
Obviously, your students need to know where to go to take the class! As obvious as this sounds, it is very easy to overlook this essential detail when crafting your welcome email.
You should let your students know exactly where to go to take the online course.
Examples:
- “You can access your poetry writing course at any time by visiting https://www.writerstudio.com/ and logging in to your course”
- “We will use Zoom to conduct our classes. Please ensure that you have downloaded www.zoom.com on your computer so that you can access it from your desktop or phone. We’ll use this same link for every class”
You may even want to suggest that your students save this email or bookmark this link so they can access the content any time they want.
Provide the Course Dates & Timing
Your course may start at an exact time or be instantly available online to binge as soon as the student buys the course.
If the course is available instantly, then you should let your students know that they can begin the course right away by clicking a link.
However, if the course becomes available or is delivered live on a certain date, then you should let the student know exactly when. This should include the day of the week, month, day of the month, year, and time zone. If possible, use technology or manually specify the time zone locally for the student, otherwise, specify a few common time zones for your area.
Tone and Style of the Email
Your initial email should have a friendly, helpful tone. If you have a more casual style, consider using some emojis or icons to help convey that. Be sure to use descriptive words and appropriate punctuation to show excitement! Let your students know that the class will be fun and that you are there to help with their learning journey.
If you want to be proactive, let students know how they can contact you. This could be via email or leveraging your Learning Management System Ask a Question or Discussion feature.
To streamline your course and encourage a self-guided class, let students know where they can find answers to common questions, like in a PDF that you have in your module for Support or New Student Questions. Either way, students need to feel confident that their new student questions will be answered promptly.
Layout & Length
Your welcome email should leave your students feeling prepared and excited, not overwhelmed. Stick to shorter paragraphs and sentences to keep it concise. Think about your key points and craft your message around them. Consider these tips:
- Use a warm and relatable greeting (e.g., Hey Musicians!)
- Have an intro paragraph of just a few sentences
- Answer the essential questions – WHAT course, WHO’s teaching, WHERE to go, WHEN to start, HOW to handle issues
- Make your email scannable with just a few key messages
- Support mobile email views and portrait/landscape orientation
- Let them know what to do if there is a problem with the course
- Use a friendly sign with your name or company/brand
Sending Your Email To Students
Now that you have created your welcome email, it is time to send it.
Your online course learning platform like www.Thinkific.com or LearnDash may already have an email system, or you may have your course integrated with your mail service provider like Mailchimp or Constant Contact.
Whatever method you choose, verify your system by sending test emails to ensure that it is delivered as intended. When testing, use a few personal emails (like hotmail, gmail, etc.) and look at the email not only on a computer web browser but also on a mobile phone mail app.
Don’t forget to use a good name for your from (e.g., Steffi Mills) as well as an appropriate email address (Teacher@SewingMamas.com).
Staying out of the Spam Folder
Don’t forget to include a brief message that reminds students to add your course email address to their approved list or friends so that they receive all future course messages.
Examples:
- To make sure you keep getting these emails, please add (Your teacher/course email) to your address book or whitelist us.
- Please add us to your contacts or safe senders list so you don’t miss any emails.
Most email communications put this line near the end or bottom of the email. Almost like a final action after a recipient reads the email.
Course Tech Support
Finally, make sure they know how to contact support in case of troubleshooting issues.
Here are some common new student problems:
- Lost course login link
- Don’t know username or which email to use
- Forgot their password
- Not working on their Operating System
- Experiencing audio/video issues
To help provide guidance on how to best get support such as via email, direct message, forum, phone, FAQs, etc.
You can also consider outsourcing your student technical support to a team of online course technical support experts by using a service like Automate Your Student Tech Support.
Final Tips
Your creative students are already enthusiastic about learning from you. After all, that is why they signed up, right?
As a teacher, it’s your responsibility to maintain to reciprocate that initial excitement by creating a friendly and helpful welcome email. This simple yet effective communication will let your students know that they are working with a smart, experienced, and caring professional.
Our final tip is to use a start and end of course survey to learn more about how your new students struggle when starting out. Over time, you can improve your emails, welcome videos, and resources to make learning with you painless, fun, and transformational!
Need More Help With Your Onboarding Emails?
If you need help with your emails so that you can better handle customer questions, new sales, welcoming students, and course questions, contact us to talk about how we can help you with your strategy, content, and technology.